Saturday, August 11, 2012

Recipe #23 - Texas Sheet Cake

It has been a really crazy week at my house! I have been cooking all these delicious recipes from Our Best Bites, but I haven't had the time to tell you about them. Perhaps I need to take a few days off of cooking, so that I have the time to blog!

This weekend, we traveled to Boise, ID to celebrate our 14th anniversary. You're probably saying, "You're celebrating in...Boise?" Yes, I know that's not a major travel destination.

Each year for our anniversary, my husband and I go on a little mini getaway - one night away, just the two of us. The hardest part about this getaway is finding someone to watch our kids overnight. I knew that there were several people that I could call to come stay at our house with them, but staying at our house requires that I clean more areas of the house than I wanted to clean. So we thought about who could watch the kids at their house.

Off to Boise we went for a "double whammy" trip - visit grandma and grandpa AND have two fantastic people watch our kids for our little getaway.

We arrived on Thursday afternoon, and my mother-in-law (aka The Goddess of Bread discussed here) was still at work. As a thank you for her help with the kids, we wanted to make dinner for them on Thursday night. Upon our arrival, I headed to the store to get the ingredients for dinner. I was making Spicy Honey Chicken, Sweet and Savory Coconut Rice, Oven-Roasted Broccoli, and Texas Sheet Cake for dessert. YUMMY!

This blog will cover the Texas Sheet Cake and I'll do other entries for the rest of the dinner later. This recipe can be found on page 238 or online here.

I thought I would make the cake first. The recipe says that you can serve it warm with ice cream, and as amazing as that sounded, I needed to be able to crank something out and have it done before making everything else.

The first step is to heat the butter, shortening, chocolate and water until the chocolate melts.


Next you combine the flour with the baking soda.


Then you combine the next set of ingredients.


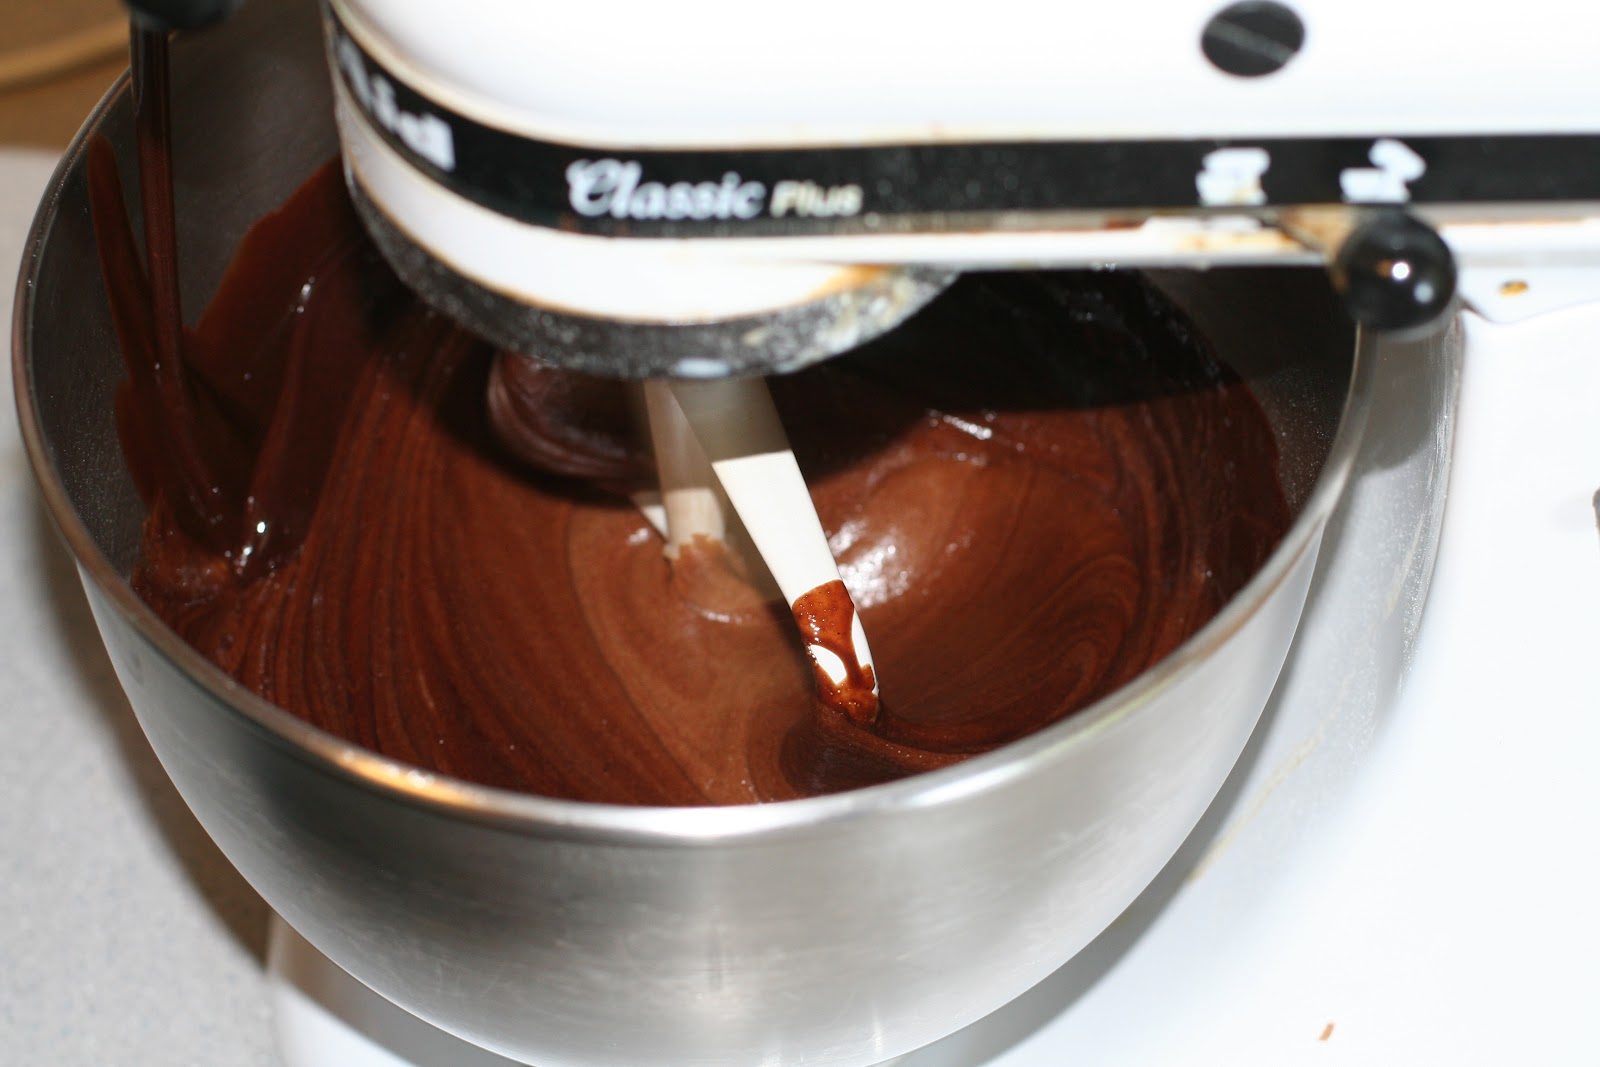
And pour in the chocolate mixture and mix.


Next you combine the flour mixture and mix REALLY well.  I have made this cake before, and I had one problem with it: I didn't mix it REALLY well.  You know how some recipes say "This batter will be lumpy."  This recipe should say, "If your batter has lumps, your cake will too!"  Don't skimp on the mixing time.  You want every single lump to be gone. (Those aren't lumps in my batter.  They're bubbles from mixing.)


Once everything is mixed well, you put it into the oven for 20-25 minutes.  (Mine took exactly 20 minutes.)


When I went to put this into my mother-in-law's oven, I had a small moment of panic.  Her oven is smaller than mine, and I wasn't sure if my pan was going to fit into it.  Check this out.  It just barely fits.  Phew!


The cake comes out the oven looking like this.


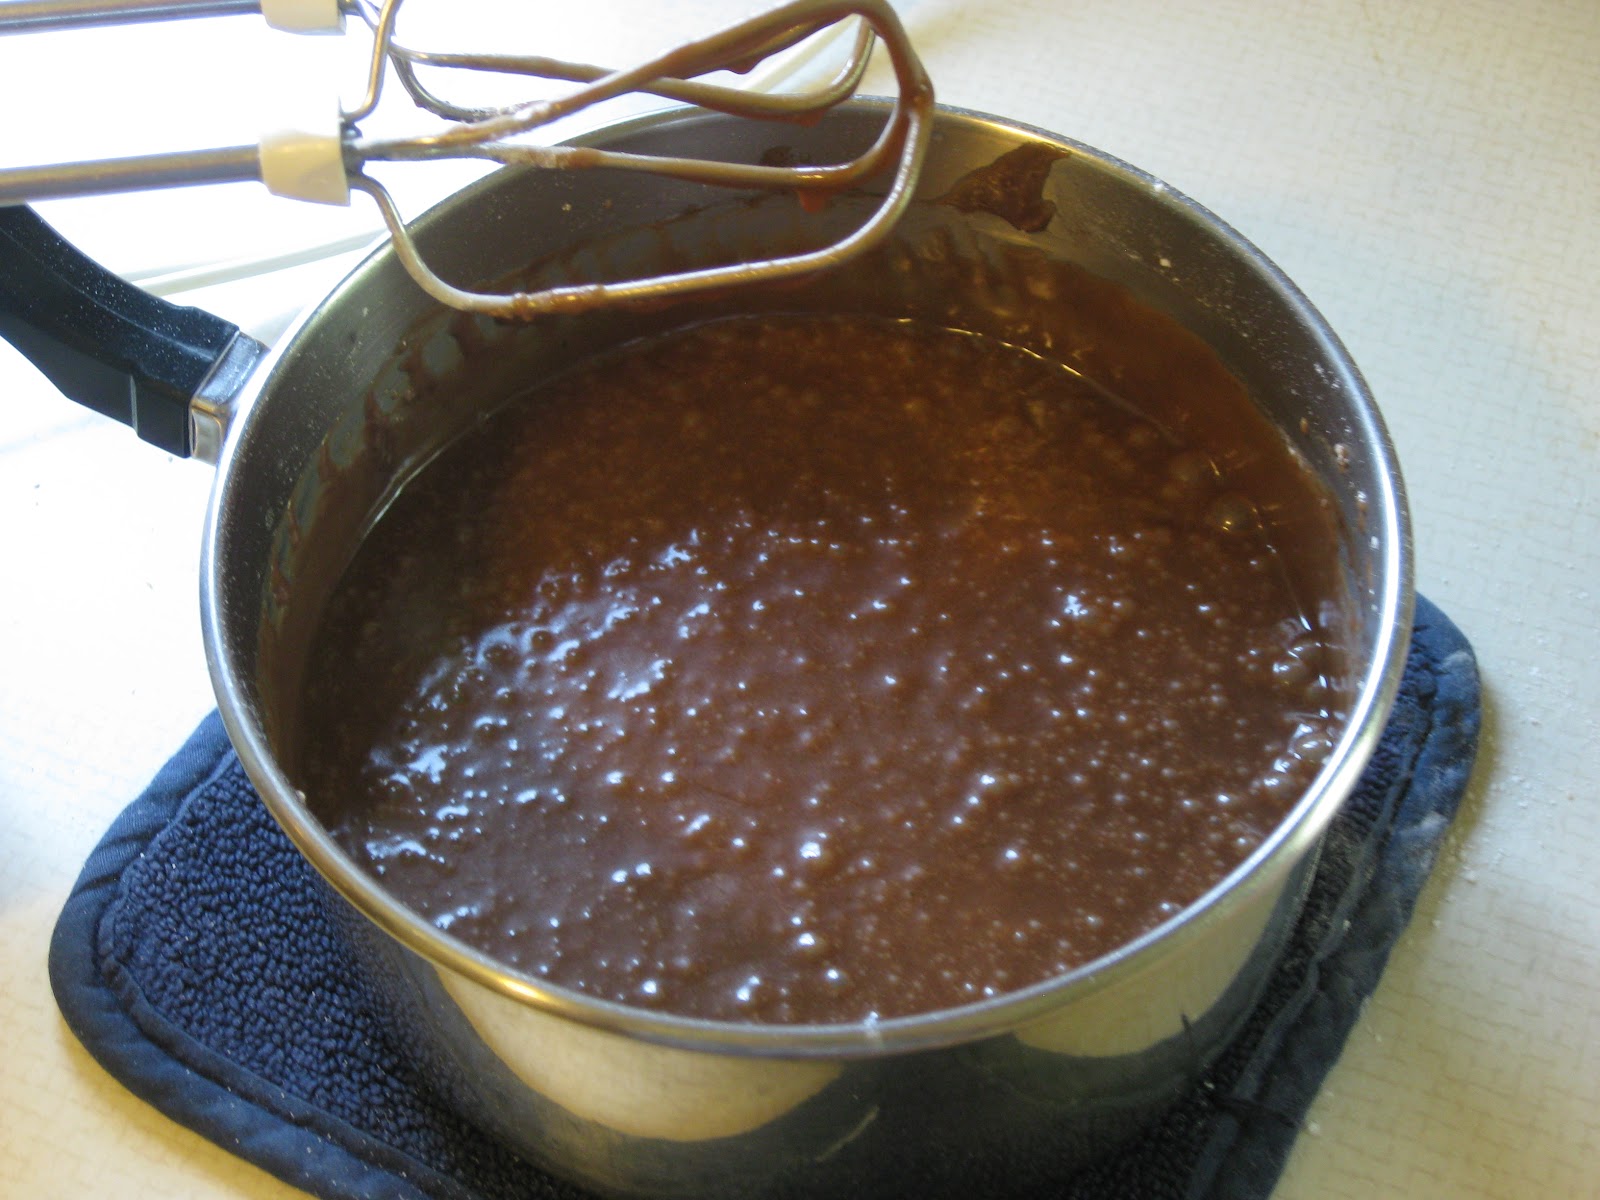
With five minutes left on the cake's baking time, you make the frosting.  This is done by heating the milk, chocolate, and butter in a large saucepan until bubbles form along the edge.


Then you add the powdered sugar and vanilla.  Confession: this recipe calls for 1 pound of powdered sugar and I only had a 2 pound bag.  This is how I measured my powdered sugar:


Pat the bag flat.  Determine what half looks like.   Add that much.  Fancy measuring skills, huh?!
 

Once the frosting is done, you pour it over the cake while both the cake and the frosting are still warm.


The result is perfectly smooth beautiful frosting without hardly trying.


We still served it with ice cream too, although it wasn't warm.


Everyone loved it!  I think almost everyone had seconds too...even if it was in the form of sneaking "just a taste" several times.

Sunday, August 5, 2012

Recipe #22 - Mint Brownies

While I was at college, it was always a treat when you went somewhere that was catered by the campus creamery.  They made the most delicious eclairs and mint brownies. (I think I dripped a little drool on the keyboard just thinking about it.)  If there are any fellow BYU alum out there, you know what I'm talking about.

Its been many moons since I have had a BYU mint brownie, but I think that this recipe is pretty stinkin' close.  You can find it in the cookbook on page 218 or online here.

This isn't a particularly hard recipe, but it does take a while to get through all the steps.  Don't plan on serving it soon after it gets out of the oven. Not gonna happen.

First, you line your 9x13 pan with foil and spray with cooking spray.  This step is such a blessing for clean up and serving.  Love it!


Then you chop up your butter and chocolate and melt it in the microwave.


I just cut my chocolate in half, but when it says to chop it, apparently they mean more than in half.  My butter melted very quickly; the chocolate...not so fast.

Next they chocolate mixture needs to cool.  This takes a little while.  If you want to speed up the process, get it out of the bowl that you heated it in and stir occasionally.


Once your chocolate is on the cooler side, proceed with mixing up the first set of ingredients.

Then you slowly add the chocolate while the mixer is still going.


Note to self:  Self, clean your Kitchen-Aid before you take more pictures of it.  Geez.

And then on low speed, you spoon in the flour and baking powder.


Now the brownie batter is ready to go into the oven.


The recipe says to bake it for 20-30 minutes.  Mine took the full 30 minutes.

Once it comes out of the oven, the brownies need to completely cool before you can do anything else.  After 2 hours, my brownies were still very warm.  We were headed to church at that point in the day, so I'm not sure exactly how long they took to cool -- some time between 2-5 hours.  Helpful, right?

Once they are cool, you get to make the green frosting part.  Its a thicker frosting, so don't expect something you'd put on cupcakes. 


Spread it evenly over your brownies and chill in the fridge.  (The brownies that is, not you.)


The final step is making the glaze.  You just melt chocolate chips and butter in the microwave.  I used dark chocolate chips, because they are heaven sent.

Crazy easy.  However, you have to let it cool for 15 minutes before you put it on the frosting.


There isn't a ton of glaze (since you just want a thin layer), so when you pour it over the frosting, make sure that you do it somewhat evenly.  This will allow you to spread it much easier than if you make a big blob in the center and try to spread it out.

After the glaze is spread out, into the fridge the brownies go again.  You want the glaze to be able to set up until it is hard.  I think that I checked mine after about 45 minutes and it was totally set.  So that step doesn't take long.

When it is time to cut them, you just lift the foil out of the pan, and you're ready to roll.  Beautiful clean edges; no digging out and destroying that first piece.


See what I mean about all these steps taking quite a bit of time, although nothing is particularly hard?  But the results are oh so delicious.


Kylie took one bite and said, "Mom, these are DANGEROUS!"  I knew exactly what she meant.  My elliptical would be groaning if I didn't start passing these out to some neighbors.

Saturday, August 4, 2012

Recipe #21 - Potato Salad

Well, this is one of the recipes that I was dreading making.  Potato Salad.  (It's on page 74, but not online.)  My kids and husband both hate potato salad.  I like it, but I don't love it.  I'm willing to eat it when I'm served it, but when I pick my side dishes while out to eat, potato salad is never one of them.  So what in the world was I going to do with a big bowl of homemade potato salad? 

Our family was invited to a dinner tonight (with lots of other families) and asked to bring a side dish.  I knew exactly what I was going to do with a bowl of potato salad, so I went to work making it!

First you need the ingredients.  You'll notice there is no mustard in this recipe.  Good, 'cuz I hate mustard.


When it comes time to scrub, peel and cut the potatoes, I do not recommend asking your 12 year old son to help.  His comments might leave you feeling a lot like the Little Red Hen and then doing all the work yourself with a much grumpier disposition.  Hypothetically speaking, of course.

While the potatoes are cooking, you can start working on everything else.  You whisk together everything but the potatoes, celery and eggs.  It looks a little like this prior to whisking.


When the potatoes are fork-tender, you drain them and let them cool at room temperature.  This might take longer than you expect.  I actually took a small cooking break and had lunch while I waited for them to cool. 


Once they're cool, you stir in the potatoes and celery until everything is coated. 


Then you fold in the hard-boiled eggs, and you have a salad that looks like this:


You'll notice that it isn't yellowy like most potato salads.  I'm guessing that its the lack of mustard in it.

I made my husband taste it...remember that he hates all potato salad...and he looked a little something like this.


Not kidding.

The salad needs to chill in the fridge for 3 hours, so be sure you give it time to do so. 

At the dinner, I didn't hear any comments about the potato salad for better or for worse.  To be fair, I didn't know a lot of the people there, so its not like they'd seek out the person that made it.  However, not a lot of it got eaten either.  It made me wonder if it tasted okay or if the non-yellowy look made it so people didn't realize it was potato salad.  Perhaps, potato salad isn't a favorite for more people than I realized.  Or it could be that there were lots of kids there, and they tended to have plates full of watermelon, rolls, and cookies.  Clearly, I've been thinking about it though.

So I called my sister at 9:30 at night, asked if they liked potato salad and if I could come over.  She and her husband graciously tried it and gave me their opinion.  Both enjoyed it, but neither went crazy over it either.  My sister mentioned it not being really mustardy and prefering it that way.

Both of them gave it a thumbs up, but they preferred to give it a "spoons up" for the camera.


I would say that this is a lot of work to go to for people who only sorta like potato salad.  For those people, go to the grocery store and buy a tub of it.  Just make it for people who will truly appreciate the hour this recipe takes to make.

Friday, August 3, 2012

Recipe #20 - Chocolate Zucchini Bread

This morning, I woke up to use the restroom about 4:15 AM.  When I went back to bed, I couldn't get to sleep for the life of me.  I refused to wake up so early, so my plan was to lay in bed until I fell asleep.  Thirty minutes later, I was still awake and frustrated.

One thing that you need to know about me is that I'm a night owl.  Like a hard core night owl.  During my "busy season" it isn't uncommon for me to be up night after night until 2 or 3 AM.  If I get 6 hours of sleep, I'm good.  Five hours of sleep?  Not quite as kind, but still fine.

Well its a good thing that I went to bed at midnight last night and actually got 9 hours of sleep the night before, because I was up and at 'em before 5:00 today. 


Who enjoys this hour?  Like people really get up at this time of day on purpose?  Ugh.  Now if I have a flight to catch for some wonderful vacation, WAKE ME UP AT 3:00 AM!  Who cares!  But, since I didn't have a flight planned, I didn't know what to do with myself at 5 AM...wide awake.

So I started to bake.  Had I known that this was going to happen, I would have had the ingredients to make a super delicious breakfast for my family.  But never in my wildest imagination did I expect to see the kitchen so early.  I did, however, have all the ingredients to make Chocolate Zucchini Bread on page 40.  It can also be found online here.

First you mix up the ingredients for your topping.


Then you whisk together your dry ingredients.


Then you go close all the doors to the bedrooms because it is time to turn on the mixer, and heaven help the child who wakes up early today!  Its one thing to be up myself, but at the very least, I can be alone.  Ironically, just before I turned the mixer on, my husband came to the top of the stairs all sleepy-eyed and said, "What in the world are you doing?"  I sent him back to bed and mixed together the wet ingredients.

Last time I made zucchini bread, I hand-grated the zucchini.  I have a food processor, but using it requires me to wash a lot of parts.  Okay, like 4, but still.  So I don't tend to get it out unless it would really helpful.  Last time I grated zucchini, I determined that a food processor would be worth cleaning...well, if your kids are awake.  This morning, I revisited my hand grater. 


Oh, and I grated my knuckle.  Not cool.  But don't worry, it stayed semi-attached and didn't make it in the bread.  Got myself a Littlest Petshop Bandaid and sent a child back to bed.


Next you add a spoonful of the dry ingredients to your chocolate chips.


This is done to coat your chocolate and help keep them evenly distributed in the bread.  Awesome trick that works great.  Then you stir it all together and load into the pans.  Next you eat some of the chocolate chips left in the bag.  Don't judge; I haven't had breakfast. 

One tip in the cookbook is that the recipe makes two very large 8-inch loaves or two less full 9-inch loaves.  It suggests making one of each.  So that's what I did.


Then you sprinkle your topping over the batter.


And into the oven it goes!  About 50 minutes later, your house smells divine and its time for breakfast!


I sat down to write this blog, with chocolate zucchini bread in hand, when my husband woke up.  He happened to walk into the office when I realized that all my photos of the final product were semi-blurry.  The problem was I was eating the piece that I cut off for the picture.  My sweet husband said, "If you need to take another picture, you could cut a piece for me..."  Way to take one for the team, honey!


Pretty sure that this might be a part of breakfast for the whole family.  Nothing like a mom who feeds her kids healthy meals.  Off to change into my workout clothes and to hit the elliptical before everyone else wakes up! 


Thursday, August 2, 2012

Recipe #19 - Pineapple Bacon Burgers

Hey there!  Remember me?  I'm Super Slacker Woman who hasn't blogged for several days.  I have cooked, but I haven't blogged.  Instead, I hosted a "Wacky Olympics" and a "Pirate Adventure"...you know, normal, every day activities.


A couple nights ago, I made Pineapple Bacon Burgers for dinner.  The recipe is on page 130 or online here.  It is definitely a quick and easy dinner!  In fact, it was so quick and easy I didn't take a lot of pictures.  Well, I was talking on the phone when I made it too.  Guess that didn't help.

First you season the ground hamburger.  Just salt and paper, folks!  Easy.  One tip that I read in the cookbook that I didn't know is that the best grilled burgers are 80-90% lean.  Leaner burger dries out and shrinks; fattier burger is too heavy and greasy.  Who knew?!  Not me.

Once your burgers hit the grill, get cooking your bacon.  I normally cut my bacon in half before cooking it for burgers.  Since I was talking on the phone, I forgot to do that. 


While you're grilling your burger, you brush each side with BBQ sauce.  Once the burgers are almost done, you grill your pineapple rings and toast your buns.  Ooh la la!


Like my radioactive pineapple photo?  Every picture my hubby took of the grilling pineapple looks like the pineapple is glowing.  It really did look normal.  Promise!

Finally, you place your burger on the toasted bun, top with a pineapple slice and a couple slices of bacon.  Then you drizzle it with some BBQ sauce and eat!


It was a hit with the entire crew.  It was a nice twist on a basic burger without needing a ton of ingredients.  Totally recommended on a night that you don't have a lot of time...or that you need to make a call while cooking dinner.